New, more search engine-friendly file names
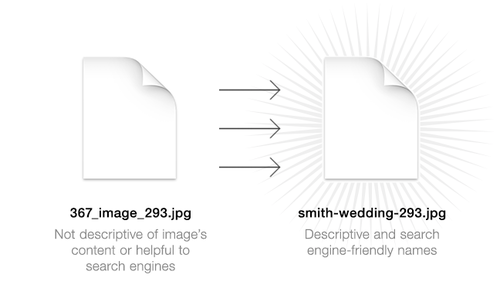
Images you upload to your website can now keep their original file name, instead of being automatically renamed.
This provides several benefits, primarily including better performance in search engine results:
Since search engines can’t see and understand a photograph, they rely mainly its file name to describe what’s in the photo. When the file name provides no useful info (like just being named “image”), search engines don’t know what’s in it. But if the file were named something like “smith-wedding-2014.jpg”, they’ll associate the keywords “smith”, “wedding”, and “2014” with the image, and start displaying the image in related search results.
Overall, this is a somewhat minor change, and something your visitors will likely never notice, but will help your work get more attention as part of our ongoing effort to give our clients the most effective websites possible.
More responsive design and faster loading for our “Tiles” layout
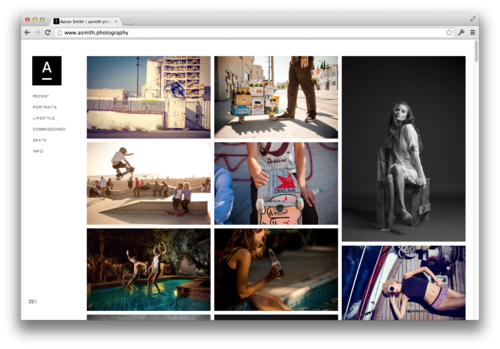
We’ve made some big improvements to our “Tiles” layout!
Now each thumbnail scales with the size of the screen, and automatically adjusts the number of columns in the layout to ensure your images are being displayed as large as possible, while still maintaining even spacing on all sides of the page. Resize your browser window when viewing a gallery to check it out!
Also, each thumbnail loads much faster. Before, the page had to wait to load all the thumbnails before any of them could be displayed. Now, each thumbnail is shows as soon as it’s loaded, making your site feel snappier than ever!
Image limit raised from 750 to 1,000
Thanks to all our great clients sharing the word about 22Slides, we’ve slowly been able to increase our image limits to accommodate larger catalogs.
When we first started, the limit was set at 200 images. Today we’ve raised the limit from 750 to an even 1000.
And as a reminder, if you need more than 1000 images, you can always use our Flickr add-on to get practically an unlimited number of photos on your site for free.
Bigger Images, Retina Support, and Better Image Quality
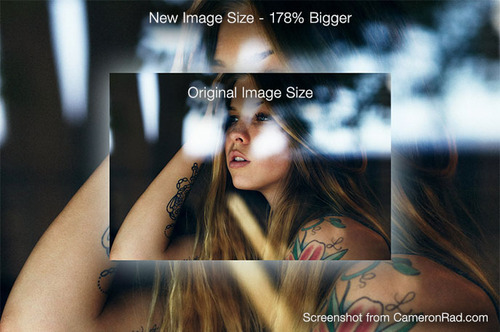
Bigger, Customizable Image Sizes
Want bigger images? Go to your new “Settings > Image Settings” page and set your size limits to whatever you like. Our previous limit was around 1100x675px, but now you can go as big as 1800x1200, filling up the entire screen of almost every size monitor.
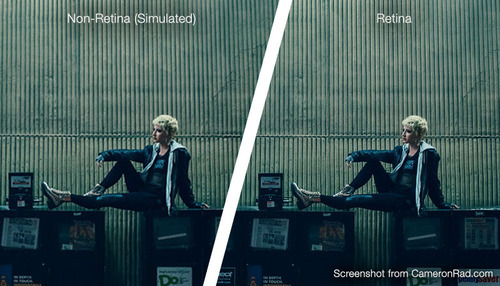
Retina Support
Bigger images mean higher resolution, especially for smaller screens like the Retina MacBook Pro. Using our largest image settings now means images are 2x the resolution on the 13“ MBP and at least 1.7x resolution on the 15”. Images appear much more crisp, just as they should on Retina devices.

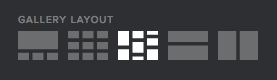
Resizable & Adjustable Thumbnails
Now you can change the size and spacing between the thumbnails on your website, to create a wide array of different looks. Want huge thumbnails? Just go to the design editor, right click, and make them bigger.
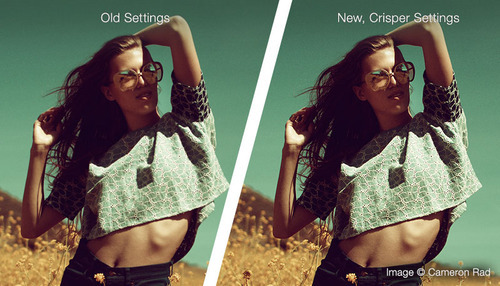
Improved Image Quality
Yet again we’ve improved image quality. This time, by using new resampling algorithms that better-retain edge sharpness without also exaggerating unwanted detail. The result is crisper edges and less noise in your images.
Other Stuff
- “Tiles” thumbnail galleries now automatically center themselves on the page, if the rest of your site is centered.
- You can now click to navigate to the next image in sideways-scrolling galleries.
- Emails sent via contact forms now include the sender’s IP address, to offer some accountability to those looking to send anonymous messages.
- The design editor now saves page location when the browser is refreshed.
- Fixed a bug that caused images to be cut off at the bottom on smaller screens.
- Collage pages now skip images from password-protected galleries and hidden galleries.
- Updated HTML editor to fix cursor position problem with newest version of Google Chrome.
New Control Panel & New Features
We’ve shifted our focus to our control panel, improving, refining, and adding new things we’re sure you’ll enjoy. We’re very happy with the results, the new features, and the foundation it provides for even more new things to come.
As always, here’s a list of the major changes:
Redesigned control panel
We’ve done away with the dated-looking 3d-rendered effects and focused more on refining the overall design and flow of the control panel. We’ve made actions more obvious, used space more wisely, and added lots of new features.
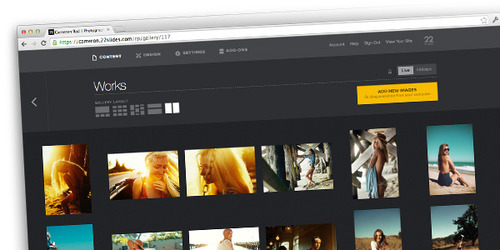
See more of your images at once
Control panel thumbnails have been made smaller and given the ability to span your entire screen. This allows for many more to be shown at once, which is great for managing large catalogs and re-organizing things.
New ability to hide images
Now you can hide/show individual images from a photo gallery without having to erase/re-upload them. This is handy for quickly making changes to your pages without having to delete and re-upload the files.
Custom image gallery thumbnails
Now you can select any image in a gallery to serve as that page’s thumbnail just by clicking a small “star” icon at the bottom left of each image. Even hidden images can be used, which opens the doors to create completely custom thumbnails that aren’t displayed in the gallery at all.
New ability to move images between pages
You can now move images to any page you like, instead of having complete the tedious task of erasing and re-uploading.
New consolidated “Content” section
The old “Pages” and “Links” sections have been combined into a single “Content” section, to make the navigation more reflective of each section’s importance and better reinforce our strategy of separating content from design.
New “Collage” pages
This new page type displays 100 random images from your website, each image linking to its image gallery. It’s a great alternative to the standard home page slideshow.
Automatic custom domain validator
If your custom domain isn’t properly setup, the “settings” page of your control panel will now let you know. It’ll even give personalized advice, telling you exactly what needs to be changed.
Improved payment fraud detection
You can now provide a ZIP code when updating payment information, which helps validate ownership of the card and ensures payments are always properly processed. If you’ve had issues with your bank declining our charges in the past, updating your payment information now should help (even if you use the same card that’s already on file).
HTML support for Dropbox add-on
You can now upload HTML files to your Dropbox folder to publish them to the web, and yes, that includes exported photo galleries from applications like Lightroom. Just export HTML, move to your Dropbox/Apps/22Slides folder, and it’s now published to the web.
Other stuff
- Improved contact form confirmation message
- Created easier way to find images’ URLs from control panel
- Increased Instagram page thumbnail sizes
- Improved responsive image scaling in “popup” photo gallery display
- Improved responsive image scaling in “sideways-scrolling” photo galleries
- Improved responsive image scaling in home page slideshows, especially when images are different dimensions
- Added support for German characters in page URLs
- Fixed bug that caused images to sometimes appear out of order in “tiles” photo galleries
- Changed closed account grace period from one to two months before accounts are erased
- Improved Flickr add-on account recognition to accept url folder names, profile urls, usernames, and contact email addresses
- Removed “trial” banner from trial sites